All posts by Andy Henderson

My journey into cycling: Paul Wheeler

Paul at Southsea
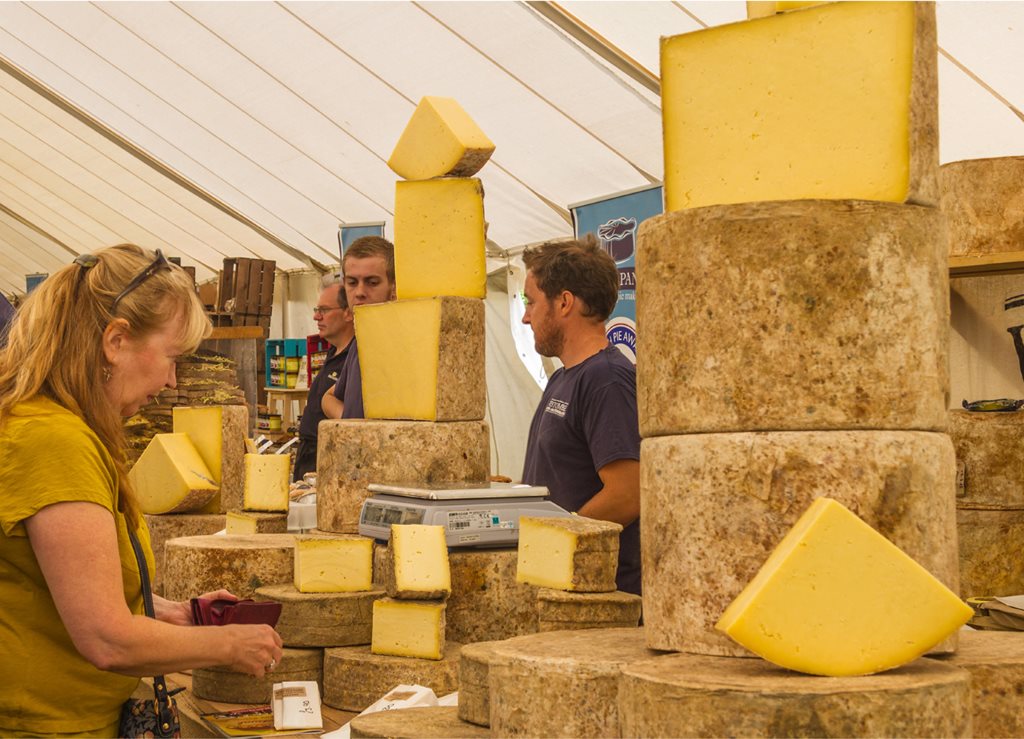
Despite having the surname 'Wheeler' I had little previous cycling experience until last year and certainly very little experience of riding in groups. I also had just moved to the area so was a relative stranger to the back roads and lanes around the Hampshire and Sussex border. I was looking for something to get me active and to meet new people when my wife suggested that I should contact Portsmouth CTC and get involved with their Cathedral Challenge. My first thoughts were that it had something to do with eating one of my favourite types of cheddar cheese, but of course it was an opportunity to go cycling.

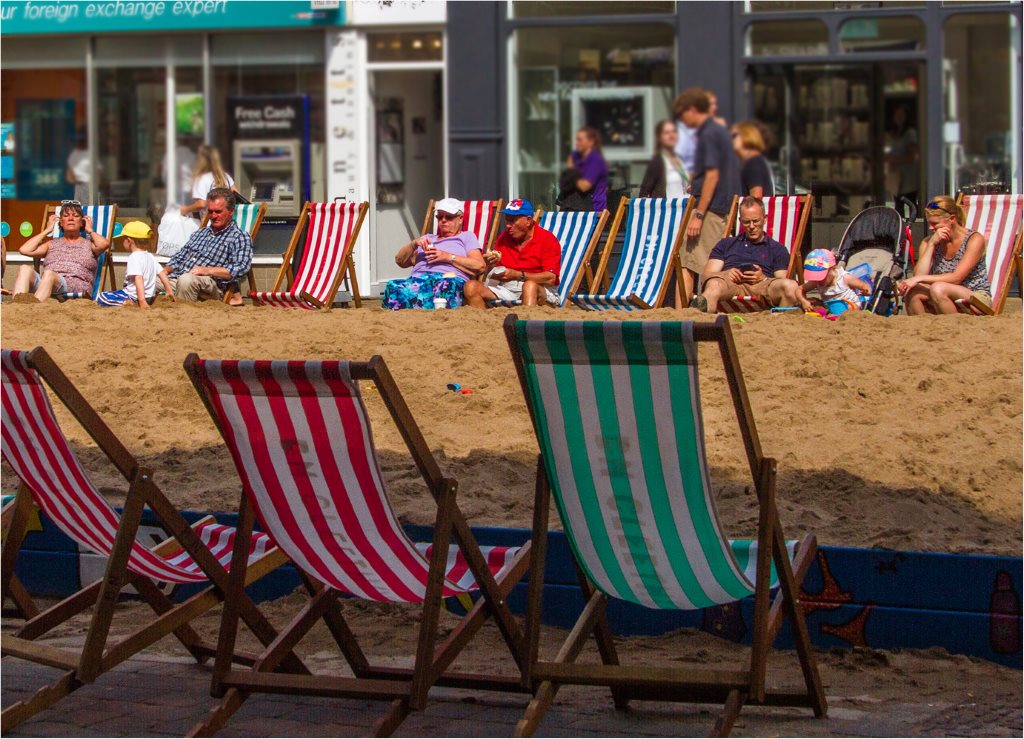
Once I had this point clarified I contacted the CTC and I arranged to meet the club at the allotted location in Havant. When I arrived, there was a group of cyclist already there but reassuringly they were certainly not a training group of lycra-clad Sky Cycling riders and so I immediately felt comfortable and that I would not be out of place or embarrassed as a 'newbie.'

After an introductory talk on the 'rules of cycling' and some very sensible safe cycling guidance we set off on a series of rides that were suitable for a range of cyclists and always led by an experienced club member together with a good shepherd at the back to ensure no-one got lost. The rides initially took us out from Havant along the mainly flat landscape and gradually increased in distance as us new riders' confidence and capability increased. Over the course of a few weeks we visited, as advertised, the cathedrals of Portsmouth and Chichester to achieve our Bronze and Silver awards while still cycling on roads that were not steep, just rolling, and at a pace that suited the group's ability.

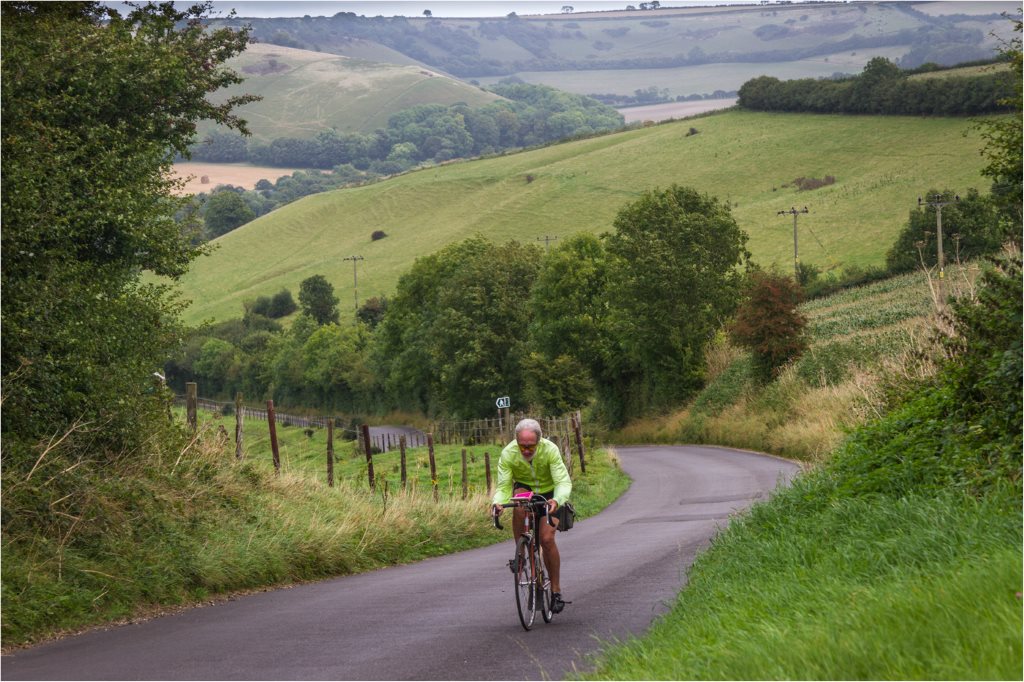
The final challenge was to cycle to Winchester and this was understandably more of a test in terms of distance and the gradients tackled. In 2016 the added challenge was an unseasonably hot day but with good leadership, plenty of water and key stops for refreshments I made it to Winchester Cathedral and then back to the South Coast.

I have neglected to include arguably the main reasons why I came back week after week on the challenge, the people. Whether it was the existing members of the club or the new riders everyone was always very friendly and encouraging and made me want to come back the next week. Oh, and of course all the wonderful cafes where we stopped to enjoy a cup of coffee (or tea) and a slice of cake.

Chain links

Chain links allow you to join a chain and - in some cases - break a chain without tools.

They are useful for:

  • Routinely breaking and making chains for cleaning - arguably the most thorough cleaning methods require you to remove your chain from your bike.
  • Repairing a broken chain - particularly while out on a ride. Note that this will usually require a chain breaking tool as well.

If I buy a new chain that comes with joining pins, I always use a chain link instead. I also carry several chain links with me on a ride - just in case.

The following sections describe several aspects of chain links. Click any section heading to show or hide it.

Types of chain link
Reusable LinkReusable link
Use Once LinkUse-once link
Connex LinkConnex link

There are three main types of chain link:

  1. Reusable chain links - these are designed to be used to join and break chains multiple times.
  2. Use-once chain links - having used one to make a chain, you are expected to discard it if you use it to break the chain again. I've read scepticism about the need to replace (which might be justified) but reusable links come with a price premium - if all links were reusable there'd be no point in producing use-once versions. The issue seems to be that the retaining edge can be damaged when removing a use-once link meaning the link can come apart while on the road.
  3. Wipperman Connex chain links - are reusable chain links. They deserve their own category because they have been specially designed to make and break easily. They cost more than other types of link (unless bought with a Wipperman chain) but breaking a Connex chain link is genuinely easy to do without tools - you simply make a 'Z' shape with the chain link and slide the two halves apart.
Sizing

You'll see that chain links are sold in 'speeds', for example: 10-speed or 11-speed. That refers to the number of cogs on your rear derailleur. The more the cogs, the smaller the spacing between them and the thinner the chain - therefore, the thinner the chain link.

In the final section 'Other types of chain link' I describe a 'Master link' which is sometimes described as "Universal". That was true some while back, but I wouldn't attempt to use one with modern 10-, 11- or 12-speed chains.

Telling reusable from use-once links

So, you've decided you want to buy a re-usable chain link. Great. But how can you tell that a chain link is re-usable or not. Should be easy - but it isn't. In practice, you'll need to take account of several clues:

  • Package description - as long as you're buying a reputable product (Shimano, SRAM, Wipperman, KMC or similar) from a reputable supplier, the package description should be definitive. If it says "reusable", it is. If it is silent about reusability, it isn't.
  • Chain size - if you have an 11- or 12-speed chain link, the chances are it isn't reusable (the major manufacturers seem to have decided that it isn't practical to produce reusable 11-speed chain links - Wipperman is the exception).
  • Product name - we're now getting into murkier waters because names can be used interchangeably. As a general rule "lock" in the name implies a use-once link. If it's a Wipperman Connex link - it's definitely re-usable.
  • Price - use-once links cost around £3 per link (two halves); reusable links come at a premium starting at around £6. Obviously it's still possible to encounter over-priced use-once links!
  • Supplier's description - this should be accurate. Better, though, if you can confirm via the manufacturer's web site. Check the packaging when the link arrives.
  • Purchaser comments - are, in my opinion, useless. You'll often see people saying links are reusable when they mean "I reused it and got away with it". That's not the same thing at all.
Adding a link to a new chain

Replacing an old chain with a new one and a chain link is pretty easy - provided you have a chain-breaking tool. My multi-tool has one and I've always got it on a ride - although I've only ever used it at home - so far!

This video describes the process of cutting the new chain to length and fitting it with a chain link. The process is the same for most types of link.

Click to display the video

The fitting process is slightly different for a Connex link. This video shows how it's done (and how easy it is to break a chain that uses a Connex link).

Click to display the video

Breaking a reusable link

In the previous section I included a video that shows how to break a chain that uses a Connex link.

For other types of link the process can be as easy as pushing the two halves of the link inwards (towards each other) while sliding the two halves apart.

In practice, I have found some links to be this easy, but others either very difficult or impossible to do this way. It's perhaps at this point you appreciate the difference between a use-once link and a truly reusable one!

The next section explains how to break a difficult link.

Breaking a use-once or difficult link

My favourite technique for breaking a chain is to use this method as advocated by Chris Juden when he was CTC Technical Officer...

Here’s a quick and easy, tools-free way of opening a chain link from CTC member and Chartered Mechanical Engineer Ian Sheppard.

"Have the chain on your largest chainwheel, with the quick-link to the front of it. Hold the crank and pull the lower length of chain forward one tooth on the chainwheel. Move the one tooth’s worth of slack up and around the teeth, so that the quick-link and one other link form a sticking-out 'V'. Tap the point of the V sharply with a something hard and heavy (a hammer is ideal but a rock will do) and the quick-link will slide open – just like that!"

I tried this method on several chains. Some links needed a little pinch first (or a sharper tap) and it helps to aim at the side of the link without a slot at that end, but if you do that it always works a treat! Ian assures us that there is no danger of damage to the teeth, because the chain is forced into their roots where they are strongest.

Fortunately, it's a lot easier to do than explain. I couldn't find a video to show the method - please let me know if you find one.

This video shows an alternate method using a bit of brake cable. I suspect one or two pairs of pliers might help the process. I would also simply take the chain off the front rings to relieve tension on the chain rather than using a broken spoke as shown.

Click to display the video

Chain Link RemoverArguably the simplest - but most expensive - method is to use a tool designed to separate chain links like this one.

But where's the fun in that!

Other types of chain link

Master LinkThis type of link is called a 'master link'. I haven't used one, but Mike Skiffins writes:

It was the only one I knew in the fifties. Single speed or hub gears so it didn't need to be sloppy in the joint, and the spring plate was no problem being used again and again. I always slid the closed end over one pin, hooked one arm on to the other pin and used a screwdriver to lever the other arm over the head of the pin into the slot. Rules are that you have to have the closed end in the direction of movement - that prevents the open ends catching and possible springing out. It is too thick to work well on a derailleur as far as I know, but then I didn't have a derailleur in those days.

The other method I know about is to use a connecting pin. Definitely not reusable (although in past times they might have been). You also need a chain breaking tool to make and break a chain using a pin.

2016 Photo competition results

Another high standard of entries this year.

After voting by the members who attended, we awarded prizes to:

  • First place: Keith Wileman who also wins the photographic competition trophy
  • Second place: John Rosbottom
  • Third place: Pat Mitchell

You can see the winning entries below. Click any image to see a larger version.

An honourable mention goes to Wilf Forrow who was just a few points behind Pat.

Keith Wileman's entry

John Rosbottom's entry

Pat Mitchell's entry

Hayling Ferry re-launch

It’s a triumph for a bunch of persistent and hard-working people and for community support – the ferry is due to be re-launched tomorrow 5th August with a full, Summer service starting Saturday 6th August.

The opening event is free and starts at 12.30 including: pyrotechnics, Police guard of honour, music by local star Chloe Anne, free face painting, and the Portsmouth Football Club mascot.

For one day only, crossings will be £1 per trip.

More details of the opening event, fares and timetable on the ferry’s new web site at www.haylingferry.net.

Service updates will appear on Facebook and Twitter. There will also be an on-board mobile phone – I’ll update Cycle Hayling's ferry status page when I know the number.

Set up OsmAnd & online tracking on Android

OsmAnd is a mapping, planning and tracking app for smart phones. It has a number of benefits:

  • The app is free
  • You can download up to 7 maps for free (England is one map) and costs for additional maps are low
  • Maps are downloaded to your phone so you don't need internet access to use them
  • Maps can be downloaded to an SD card (useful if your device has an SD slot and limited main memory)
  • You can track your route, and/or follow a pre-planned route
  • Includes route planning
  • Includes a feature to interface with our online tracking service
  • Lots of features and options

Several Portsmouth CTC riders use it already including Me and John Rosbottom - could you get a higher recommendation?

Note that you do not need the app to monitor where people are on a ride. For that you just need an internet-connected browser.

This article explains how to get OsmAnd onto your phone and - if you want - how to link it to our online tracking service. The notes and screen shots are from the latest version of Android at the time of writing, Marshmallow. They should also apply broadly to previous versions although there will be some differences.

The following sections include some Android screenshots. Click any one for a larger version.

To install OsmAnd, click any of the following for more detail:

Connect your phone to the internet

If at all possible, connect to wifi (rather than mobile data) before you start. Installing OsmAnd and maps involves a lot of data, using wifi could save a lot of money and/or a big hit on your monthly broadband allowance. If you use wifi, try to get as close as you can to the router box - it could significantly improve download speeds.

Use Google Play to install OsmAnd

Look for the Play Store icon on your home screens:

PlayStoreIcon

Tap the icon. If you can't find it, click the apps icon at the bottom of any of your home screens:

AppsIcon

You should see the Play Store; in the alphabetic list of apps, tap it to go to the Play Store.

In the Play Store, enter "osmand" in the search box at the top:

PlayStore

Tap the entry for OsmAnd (the first entry in the screen shot above - note the icon should be the same (unless OsmAnd has changed it since).

Now tap 'Install' at the OsmAnd screen and follow the prompts to install it on your phone.

To put an OsmAnd icon on one of your home screens, go to the home screen where you'd like it. Tap the apps icon:

AppsIcon

Find OsmAnd in the list. Press the icon until you see the home screen and drag the icon to the position you want.

Download the maps you need

Tap the OsmAnd icon to run it. You'll see a display like this (although you won't yet be able to see a map):

OsmAndMain

Tap the 'three lines' menu icon at the bottom left to see this menu:

OsmAndMenu

Now tap 'Manage map files' to see a screen like this:

OsmAndManageMaps
Tap 'Europe', 'United Kingdom', 'England' to see something like this:

OsmAndEnglandDownload

Tap the download icon to the right of 'Standard map' to start downloading your map of England.

You can use the above mechanism to download detailed maps from around the world.

Install the 'Trip recording' plugin

Start OsmAnd to see something like this:

OsmAndMain

Tap the 'three lines' menu icon at the bottom left to see this menu:

OsmAndMenu

Tap 'Plugins' to see a list of plugins. Tap 'Trip recording', then 'Get' to download the plugin.

To connect to our online tracking service, click any of the following for more detail:

Connect your phone to the internet via mobile data

To connect to our online tracking service, you need to be able to connect to the internet via mobile data. There's no issue using wifi where it is available, but while out on the road, mobile data will be your main means to connect.

If you already use mobile data while you are out and about, you won't notice the extra data used by the tracking service - it is very frugal.

If you have mobile data switched off so that you connect to the internet only via wifi, switching mobile data on can lead to nasty surprises as other apps pile in to use mobile data while you are not using wifi. If you are a pay-as-you-go customer, you might see your balance quickly drop to zero. If you pay a monthly connection fee, you might see your data allowance disappear.

Before you switch mobile data on, you should therefore consider installing a firewall app like NoRoot Firewall (my preference) which allows you to control which apps can use mobile data. I've found, though, that even this doesn't fully control use of mobile data since Google code is allowed to by-pass the firewall. I plan to produce a tutorial (or find one on the web) to cover this when I have time.

Configure the 'Trip recording' plugin

Start OsmAnd to see something like this:

OsmAndMain

Tap the 'three lines' menu icon at the bottom left to see this menu:

OsmAndMenu

 Tap 'Plugins' to see a list of plugins. Tap 'Trip recording' to see a screen like this:

OsmAndPlugin1

Tap 'SETTINGS' to see...

OsmAndPlugin2

I'll be honest, I don't know what effect your selection has here. Having experimented a bit, the settings seem to apply regardless of which option you choose. I always choose the cycling icon, and have the same icon selected on the main OsmAnd screen.

You will then see the trip recording settings...

OsmAndPlugin3

It's worth going through them all. For the time being, though, swipe down to the bottom of the list to see the online tracking settings...

OsmAndPlugin4

Tap 'Online tracking' to tick the checkbox (as shown above). You will automatically start logging your position to the web site any time you are tracking your route and you have mobile data switched on.

Tap online tracking web address to see a screen that allows you to specify how OsmAnd should talk to our web site. Enter the address exactly as you see it here...

OsmAndPlugin5

... except that you should put your web site user name (the id you log in with) instead of xxx and the tracking password you set in your profile (more about that here) instead of yyy. The password is case sensitive so make sure you enter upper and lower case characters exactly as you entered them in your profile. Note that the address does not contain any spaces or newlines.

Finally, tap online tracking interval to see:

OsmAndPlugin6

We suggest you select a 5 minute tracking interval, as shown.

Test online tracking

It's worth checking that online tracking is working before you use it for real. To do that, go outside to make sure you have a decent GPS signal. Make sure mobile data is on (via Android settings: Data usage). Start OsmAnd and, on the main screen...

OsmAndMain

Tap the 'GPX' icon at the top right so it turns red. After 5 minutes, check the online tracking page to see if your position appears. If it does, you're ready to go. If not, check the following:

  • Online tracking web address - it must be exactly as specified above
  • The online tracking check box in the trip recording plugin is ticked
  • Mobile data is switched on
  • You have a mobile phone connection
  • You have a GPS fix (I find an app called 'GPS Test' useful for that)

How to use online tracking

Online tracking allows any CTC member to use a smartphone or tablet to record their position on this web site while they ride.

Any member can display the latest positions of one or more riders. Further, members can issue non-members a guest password (which should not be made public) so they can follow riders too.

Online tracking has a number of uses. For example, it can be used by:

  • Partners who would like to know:
    • when to get a meal ready
    • where someone is if they are later than expected
  • Someone wanting to contact a rider (it's easier to hear and handle a phone call at a stop)
  • A rider who has lost the group
  • A leader who has lost a rider

During testing, John Rosbottom's wife, Wendy, called him on his mobile to ask him why he'd taken a wrong turn!

It could also be used for a variety of purposes unrelated to cycling; for example my daughter in Horwich could track my progress up the motorways when Margaret and I visit.

There are a number of similar services available on the web - and they have their benefits. Our service is:

  • Designed to meet our specific needs and (should be) easier to use
  • Advert-free
  • Minimal overhead
  • Free to members

This note explains how to use the service to record your tracks online, and how to monitor positions using the web site.

How to record positions online

Click any of the following to see more information...

Equipment you need

You will need a portable device with capabilities to:

  • Access the internet
  • Use the Global Positioning System (GPS) - technically it is also possible for devices to determine their rough position by triangulating mobile phone towers, but it's highly likely a modern phone will have GPS which is far more accurate
  • Store the maps needed by your chosen tracking software - it's unlikely that will be a problem for a modern phone

Typically you will use a 'smart' phone or a tablet with phone capabilities. You don't need to be able to see the display to use the service so it needn't be fixed to your handlebars. Instead, you can put it in a back pocket, for example.

Services you need

Internet access. There are two kinds of access:

  1. Pay-as-you-go: you pay for using the internet at a rate per megabyte determined by your provider.
  2. Tariff: you pay a certain amount per month and, for that, you get an allowed amount of free internet use over mobile data.

Normally, you don't have to do anything to continue to use the same service abroad. Instead, your provider probably has a roaming arrangement with other providers which take over as you leave the country. Roaming charges can involve a premium, however, so regular travellers sometimes use a SIM card bought in the country to take advantage of local rates.

You also need access to the members' area of our web site (only to log positions - you can invite non-members to see positions, see below). If you don't have access and you are a member of Cycling UK, click here to find out how to get access.

Software you need

You need an app that can:

  • Track your position
  • Log your position to our web site

Note that if all you want to do is keep a record of where you've been on a ride, you don't need online tracking. Online tracking is not designed to keep a detailed record of your track - that's best done on your phone.

The software we've been using to test the online tracking software is OsmAnd. It has a number of benefits:

  • The app is free
  • You can download up to 7 maps for free (England is one map) and costs for additional maps are low
  • Maps are downloaded to your phone so you don't need internet access to use them
  • Maps can be downloaded to an SD card (useful if your device has an SD slot and limited main memory)
  • You can track your route, and/or follow a pre-planned route
  • Includes route planning
  • Includes a feature to interface with our online tracking service
  • Lots of features and options

Note, however, that although there is an Apple IOS version of OsmAnd, at the time of writing it cannot interface with online tracking. We are looking for a suitable IOS alternative - can you help?

We'll update this section as we learn of other apps that can also use our online tracking service.

Update your web site profile

At the foot of your profile page you will see options to enter two passwords. The first is the password you will need to connect your mobile device to our online tracking service. The second is a guest password you can issue to non-members so they can monitor positions online without having to go to the members' area first.

Set up your software

We will write separate articles to describe how to set up individual software products. We expect that compatible products will allow you to specify a web address using tokens that get replaced by data when logging each point.

In OsmAnd (the app we used to test the tracking service), the web address for online tracking looks like this:

https://www.portsmouthctc.org.uk/ctc-trackme.php?lat={0}&lon={1}&timestamp={2}&user=xxx&pwd=yyy

Where:

  • {0} is replaced by the longitude of the position being logged in degrees and fractions of a degree
  • {1} is replaced by the latitude
  • {2} is replaced by the number of thousandths of a second since midnight (GMT) on 1st January 1970 - sometimes known as a Unix timestamp
  • xxx is your username (the Id you use to log in to the site
  • yyy is a tracking password; you set that up through your user profile

We expect that all apps that can interface to online tracking services will allow you to create a similar web address. If, however, your app supplies data in a different way (for example, using a date and time rather than a time stamp) it's not hard for us to adapt our software to fit.

NB do not start the web address with "http" - use "https" instead.

Click here to see how to install OsmAnd to an Android device and connect it to our online tracking service.

Battery drain

It's not uncommon to hear people concerned that using GPS flattens batteries. And it's possible, that's the case with some phones. However, my (limited) experience with modern phones is that using GPS has very little effect on battery drain. I can easily record a day's ride and still have my battery at 80% plus - and that is using one of the cheapest phones.

Battery capacities tend to go down over time, so the effect might be more pronounced with an older phone. It shouldn't, however, be a major issue for a modern or new one.

Logging your position over the internet will use power and therefore increase battery drain. Again, however, I've not seen a significant drain additional to the power lost by having your phone switched on and listening for phone calls.

Likely costs

We have designed the online tracking service to use very small amounts of data to minimise any cost to you.

If you pay a monthly tariff to use your device, that will almost certainly include an amount of free internet access. If you are frugal with internet use, it's likely you will not have to pay any extra.

If you pay for usage 'as you go' you will pay for using the online tracking service. In my experience, logging my position every 5 minutes on a day ride uses significantly less than a megabyte of data. Your additional cost should therefore be less than 10p per ride.

Note, however, that when you allow your phone to access the internet over mobile data (i.e. using the phone signal rather than wifi) several apps will want to start using it as well as the online tracking service. The amounts of data used by these apps will be considerable and can quickly drain your monthly allowance or force you into an early PAYG top-up. To address this problem, you need to take charge of how apps use the internet. I intend to produce an article about that shortly.

On the other hand, if you have a large monthly allowance and already have your phone connected to the internet while you are out and about, you will not notice the additional data used by the online tracking service.

Privacy policy

All data collected via the online tracking service is treated with respect and in accordance with our privacy policy which we set out here.

How to monitor positions online

You monitor positions using a web browser like the one you are using now. To do that go to the online tracking page. It's available via the 'Routes' menu in the menu bar at the top of our pages.

The rest of this section explains how to use the monitoring page. Click any of the following to see more information. Click any of the screen shots to see a larger version...

Access control

If you are logged in to the members' area of the site, you can start using the page straightaway.

If you are not logged in, you will see the following:

Log in page

If you have member access to the site, click the log in link to log in the usual way. You are returned to the tracking page when you log in.

If you have been given guest access to the tracking page, enter the user name of the person who invited you and the guest password you were given, then click 'Submit' to get access to the tracking page.

The map display

If you go to the monitoring page and someone is tracking their position, you will see a map like this:

Map display

Below the map, you will see a key that explains the icons shown on the map:

A position recorded in the first half of the track
A stop recorded in the first half of the track
A position recorded in the second half of the track
A stop recorded in the second half of the track
The rider's latest position

You can click any icon to find out more information.

A stop is defined as two consecutive positions that are less than 50 metres apart.

We use different colours for each half of the track to make it easier to see what's happening if a ride returns along a similar route to the outgoing leg.

The map is a Google map and you can use the usual methods to zoom into a portion of the map. You can also switch between map and satellite views. When you click 'Update the display' the page shows the latest recorded positions using the same map settings so you don't have to keep zooming in to the map.

If you want to redraw the map so you can see all the recorded positions for the day, use the 'Change date' button to re-select 'today'.

Showing multiple riders

If more than one rider is recording their position on a given day, you see a selector like this:

onlineTracking3

If you want to see the progress of just one rider, click their name in the 'Show selected riders' section and click 'Update the display'.

On some days there will be multiple riders on the road following different routes - possibly in different countries! To show a group of riders following the same route, pick one of them (you can see people's names by clicking on a map icon), click their name in the 'Show riders with' section and click 'Update the display'. The map shows all the riders whose latest position is within 5km of the last position of the person you selected. The check boxes in the 'Show selected riders' selection are updated to show the riders you selected. That allows you to add or remove riders to fine tune your selection.

Note that following multiple riders on the same ride is likely to give you a better indication of progress than following a single rider - especially in places where phone coverage is poor.

Update the map

Click 'Update the display' to redraw the map. The page retains the map's position, zoom level and map type (i.e. map or satellite).

Refreshing the page will lose all your selections and will show 'today's' tracks on a map display. That's unlikely to be what you want.

To keep your rider selections but redraw the map so all logged positions are visible, use the 'Change date' button to reselect the same date...

Select a different date

By default, the tracking page shows you positions logged 'today'.

If you want to see positions recorded for a previous day, click 'Change date' to see a date selector. Simply click the date you want to see.

Selecting a date automatically repositions the display and zoom level to show all the positions recorded on the given day. It also sets the map type to 'map'.

Mike Izod

I'm very sorry to have to report that Mike Izod - a regular rider with us until 18 months ago - has died.

Irene Izod writes:

It is with great sadness that I have to tell you Michael died on 28 April 2016 having lost his fight with lymphoma.

He thoroughly enjoyed his cycle rides with the Portsmouth CTC and last autumn had purchased a new bike which he was looking forwarding to testing out, unfortunately that wasn't to be.

The funeral will be held at Portchester Crematorium on Tuesday 17 May at 11.45am and any member would be more than welcome.