Category Listing: General interest

Photo sharing

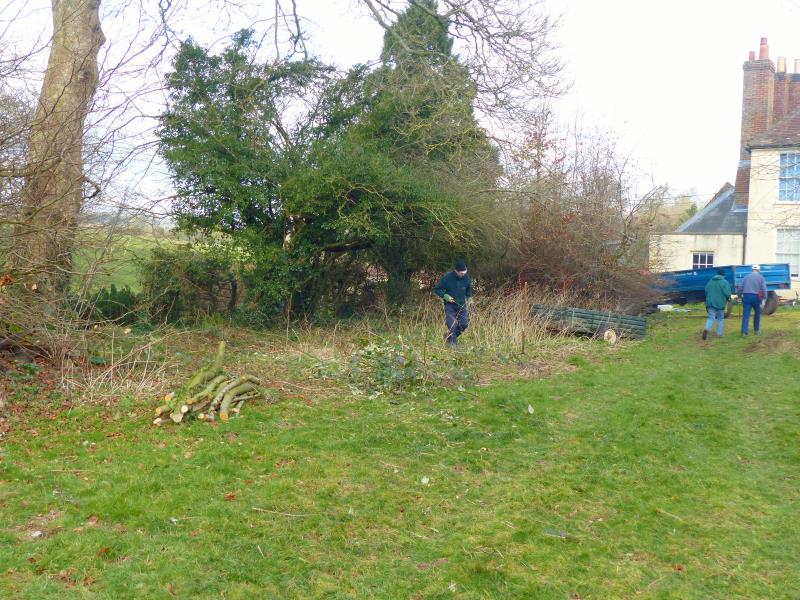
Photos are a great way to share and remember cycling experiences, and we use them heavily on the website, the club magazine, and at club evenings. While you can include the odd few photos in website articles, our website isn't really set up to store hundreds and hundreds, but don't despair.

Sharing photos on the web is getting easier and easier and can even be free. In fact, we recommend uploading your precious photos and other files up to the web as a backup for when (not if) your phone or computer eventually dies! Once they're uploaded, you can very easily share a link to them in a post, or by email - e.g. for use in the magazine, or club meetings.

It's not difficult these days. The easiest and free way to get started is to register for a free account with one or more of the websites below, if you haven't already. Here are some we've tried and can recommend:

  • Dropbox. Great one minute intro here. Brilliant if your main interest is occasionally sharing photos with others, and backing up your photos (and all your other files as well). It gives you a folder on your computer that automatically syncs to Dropbox's website, and to any other computers, phones or tablets you have. It's free for the first 2 GB, which is enough to store several hundred photos. Highly recommended - the original and still the best - everyone should have a Dropbox!
  • Google Drive. Good intro here. Similar to and almost as good as Dropbox, but 15 GB free storage, and especially good if you already have a google account. Google also offers to back up all your photos automatically, totally for free if you don't mind slightly less than maximum resolution.
  • Google Photos - very new and trendy, but not recommended yet unless you're very comfortable with smartphones and computers.
  • Flickr.com. Good intro here. Great for organising and sharing your photos, and fairly simple to use. It's the world's most popular photo sharing website, owned by Yahoo, and offers up to 1TB for free - that's 1024 GB - it's HUGE.

Once your your photos are uploaded, click the 'sharing' option to get a link (a web URL) to them. Usually, you'll be sharing more than one photo, so best to first group them into a folder or album and share that in one go. Simplest is to make them public, but it's pretty secure, as the link is usually so complex that no-one else could guess it, but if you're paranoid about security, and don't mind a bit of extra work, you can share them so they're only visible to specific named individuals.

As an example, I just created an album on Flickr of my CTC ride to Wiggonholt - you can follow the link here.

Do give photo sharing a try!

Alternatively if you just want to send one or more photos to someone without filling their email inbox, there are several free services that allow you to send your photos via a web site. Your recipient gets an email to let them know your files are available together with a link allowing them to download them when they're ready.

There are a lot of sites offering this service for free and without asking you to create an account first. You just provide the destination email address(es), your email address and the files you want to send. The web site does the rest. Beware, however. These sites have to earn their money somehow. Some ask you to give permission for them to send you and your recipient 'promotional material' which could be irritating at best and offensive at worst - so read the T&Cs carefully. This site...

www.wetransfer.com

... gets its revenue by displaying adverts as background images while you use the site, It seems to be benign. You can even upload files without providing your recipient's email address (they might not take too kindly to you giving their email address to a third party). You get a link you can email to your recipient privately. To use the free service go to the web site and click the '?' icon at the bottom right of the left-hand pane for more information.

Tackling hills

A hillWe are very lucky to have the South Downs National Park on our doorstep. It's a great place to cycle with fantastic views and the scenery seems to change mile-by-mile and week-by-week.

But there's no getting away from it, cycling in the SDNP means tackling hills.

This note describes some approaches to getting up hills on a bike - and some suggestions for what to do if you can't. Click any of these headings to find out more...

Strength and fitness

Cycling musclesOf course, you need a certain level of strength and fitness to do hills. But you don't need to be super-human. Anyone with average strength and fitness can manage most of the hills we do.

Other issues such as technique and a positive attitude are usually more important.

Having said that, cycling up a hill requires a particular set of muscles to work together. Collectively we call them 'hill legs'. When you start doing hills you're bound to get some stiffness as your legs adjust to the new demands you're putting on them. The only way to get 'hill legs', however, is to do hills.

As you do hills, your strength and fitness will improve. It's not always possible to tell that's happening. Your first indication might come when you realise you're taking less time to recover for the next hill.

Don't believe your eyes

View up a hillYou might have experienced the foreshortening effect already. As you approach a hill it looks impossibly steep. When you get there, it seems to magically level out into an easy climb. Where did it go?

It's an optical illusion, you really can't believe your eyes.

The effect is magnified if you're going downhill into a valley looking at the hill the other side. In this situation, hills can appear almost vertical.

Obviously, you can't ignore the fact that there's a hill coming, but don't let it defeat you before you even get there. Don't trust your eyes.

False summits can really get you down. You think you're approaching the top, the road is levelling out, but then you realise you've been unable to see there's another section of hill to come. If you're on a hill you don't know, try asking others cycling with you if there are false summits - it's much better to find out before you get to them.

Because of the foreshortening effect and false summits, some people find it unhelpful to look up the hill while they are on it. You need to be aware of what's in front of you, but try looking at the road four or five metres in front and resist looking up until you know you're at the top.

You might also encounter a 'false flat': a stretch of road that looks flat, but isn't. The only solution is to be aware of the possibility and be prepared to drop to lower gears if you encounter it.

Get to know your gears

The drive trainSome people can manage to get up hills on a single gear, but that's not normal!

You're going to need to use your gears, so it's worth getting to know a bit about them:

  • You probably have a range of gears attached to your back wheel, known as a "cassette" or "the sprockets". As you change gear from a smaller sprocket to a larger one, you'll notice that it's easier to cycle but you have to pedal faster to maintain the same speed. The bigger sprockets are the ones you need for hills.
  • You probably have two or three gears between your pedals. These are known as "chain rings". They work the opposite way to the sprockets: the smaller/smallest rings are the ones you need for hills.
  • Learn which gear adjuster controls the front gears and which the back.
  • Learn how to lower your gears (move to smaller ring at the front and the larger sprocket at the back). It can be confusing because - for most gear shifters - the action that lowers the gear with your left hand shifter, raises the gear with your right - and vice versa. As you approach a hill, you want to be sure you are shifting in the right direction.

To change to a large chain ring, your shifter pulls a cable to drag the chain across. To return to a smaller ring, your shifter releases the tension in the cable and a spring pulls the chain back. You cannot therefore control the tension used to change to a smaller ring. If you are cycling up a hill, the chain will be straining against the chain ring and the spring won't be strong enough to move it. You try to change to a lower gear and nothing happens! As you approach a hill, you should change to a smaller chain ring before you get to it.

When you are on a hill you'll find it easier to change to a lower gear at the back than at the front. Even so, you still need to overcome tension in the chain. So:

  • It's better to be in too low a gear than too high. Start the hill in a low gear.
  • As you go up the hill, don't wait until you are struggling before deciding you need a lower gear - try to always be in a lower gear than you think you need.
  • If you have to change gear on a hill, practice reducing pressure on your pedals as you change. If you coordinate your gear change and pedal pressure, it takes a very short time to make the change and you lose little forward momentum. After a while it comes naturally - it's very useful technique to master.
  • As you are riding, keep an eye open for hills, so you have time to anticipate them and react; when going round a blind bend, bear in mind it could be the start of a hill. Get to know which road signs tell you a hill is coming.
  • Practice your gear changes so they become second nature and you always change in the right direction.

If you drive a car with manual gear change, you'll already be familiar with some of these techniques.

Slow and steady

When faced with a hill, it's natural to try to take a run at it and get to the top as quick as possible. For some hills that will work but for long or steep ones that's exactly the wrong approach. You'll find either your legs will tire quickly or you will run out of puff. Either way, you'll have to stop part way up.

Going up slowly in a low gear takes patience, but it's easier. Take it slow from the start of the hill, if you wait until you feel the effects before slowing down, it will be too late; you're already running out of oomph.

... unless it's a dip

If you're riding down into a dip with a hill the other side, use all the speed you've built up on the downhill to give you momentum to help you up the other side.

Bear in mind, though, that you might need to switch quickly between a high gear on the downhill to a low gear going back up. To change gear while you are coasting, you have to turn your pedals - that's just how they work. If you don't turn your pedals, the gears won't change and you'll get a nasty crunch when you push down hard.

Stay positive

Here's a thought. It can be easier to do a difficult hill that you don't know, than one you do.

Surely it should be easier to do a familiar hill because you know what to expect? But that's the point. Psychology plays an important part in getting up hills:

  • It can work for you: if you're confident about getting up a hill, you're more likely to make it
  • It can work against you: if you convince yourself in advance that you won't make a hill, you probably won't

So treat all hills as if you were approaching them for the first time. You might have had a bad experience last time, but that could be for a number of reasons. We all have off days (or weeks, or months). Maybe you're a bit stronger this time, perhaps you've improved your techniques. Set bad experiences aside, and see what you can manage this time.

Get out of the saddle

Getting out of the saddleThis technique involves straightening your legs so you're standing on the pedals and then transferring your weight on to the highest pedal forcing it down then switching your weight to the other pedal; then repeat.

It allows you to put more power into the pedals, but is a lot more tiring than normal pedalling.

It's standard practice for professional riders, and some of our members do it a lot when climbing hills. Most of us, however, reserve the technique for:

  • Short, really steep hills
  • Times when we are on a hill in the wrong gear and can't change into a lower one
  • Putting in the final effort to get to the top of a difficult hill
Watch your weight

The lighter you are, the easier the hills. Have a look at what you are carrying. Do you really need all of it? Individual items might not weigh much, but taken together you could be adding quite a bit of unnecessary baggage.

Take care if you have large panniers. They invite you to add more and more stuff that you might need, but never do.

The heaviest single component can be the most difficult to deal with: the one on the saddle. Going out for regular rides with us can help but you won't lose much weight through exercise alone. You need to get in control of what you eat too. In fact, exercise can increase your weight since muscle weighs more than fat.

Food, air and water

Food as fuelFor your muscles to work they need fuel, and oxygen to burn it. Your body needs water to function.

If your body wants to breathe or pant, there's a reason. It needs extra oxygen. So give it what it needs. Breathe through your mouth and deeply.

The longer and hillier the ride, the more fuel and water you'll need. So:

  • Start with a decent breakfast.
  • Drink plenty of water the day before, and before you start the ride.
  • Take something to eat with you in case you need a top up (Nak'd bars, fig rolls, fruit pastilles and wine gums are all cheap alternatives to, arguably, more effective top-ups such as energy gels).
  • Always carry water, and drink regularly during the day. If you're not comfortable drinking while riding, try to get into the habit of taking a drink every time we stop. Don't wait until you're feeling thirsty.

If you sweat, you lose more than water. You also lose important elements, notably sodium and potassium. Most meals will replenish sodium and potassium levels but you might find it helpful to take supplements between times. For example, a bag of crisps or a banana at elevenses or tea.

Supplements in your water bottle can also be helpful. There are three basic types:

  • Electrolyte supplements: designed to replace sodium and potassium. A cheap alternative is a teaspoon or two of rock salt dissolved in your water bottle with some sugar-free lemon squash to mask the taste.
  • Energy supplements: designed to give your body readily-accessible sugars that your body can easily convert to energy
  • Electrolyte and energy supplements: do both things at once.

As you're cycling, you might feel a little light-headed and strange. If you do, let the rest of the group know and stop. You might be about to 'bonk'. Your energy levels are so low, your body simply packs up and you faint. Eat and drink something. Take advice from more experienced riders. Please don't ignore the symptoms if you get them, fainting on a bike can be extremely dangerous.

If you can't make it

You either run out of puff, or your legs won't work for you.

Stop safely. Be aware of traffic around you. Give riders behind you warning you might be stopping so they have time to get round you. Ideally you want to stop where you can get off the road.

Let someone know you've stopped. The back marker should be aware of you, but it's worth making sure. The ride will wait for you (and anyone else that's struggling). They will normally wait at the top of the hill, but might be a bit further on if there's no safe place to stop.

Having stopped, you have two choices:

  1. Get off your bike and push it up the rest of the hill
  2. Wait a minute or two, get back on and ride

If the hill is steep, it can be difficult to restart, so pushing might be the only option. Otherwise, you might be surprised how quickly your body recovers when you try option 2. It can be less tiring overall than option 1 - and you will have the satisfaction of completing the hill on your bike.

Don't worry what the rest of the group is thinking. Everyone has had to push up hills. They know what it's like. Try not to think of pushing as a failure; instead think of it as preparation for the next hill.

Look after your gears and chain

To ensure gear changes are as smooth as possible:

  • Keep your gear changing mechanisms (the derailleurs) dirt and rust free, and lightly oiled.
  • Use proper chain lube to keep your chain in good condition.

Cables will stretch over time in which case you'll find it increasingly difficult to engage the gear you want. Your bike will have tension adjusters either as part of the derailleur, the gear shifter, or both. They allow you to adjust cable tension without needing tools. To make larger corrections you'll need a screwdriver or an allen key.

We say that chains 'stretch' too. In fact they get longer because of wear in the chain. If your chain starts slipping on your sprockets it has stretched too far - but by then it's too late. You've almost certainly damaged the sprockets and they'll need replacing too. Some of us carry chain gauges for checking chain stretch, and any decent bike shop will be happy to check your chain for you. Try to check it every couple of months and - as it gets close to needing replacement - more frequently.

In any case, sprockets and chain rings wear over time and will need to be replaced. There's an argument for replacing your sprockets with every new chain - you can keep using your chain until you detect chain slip, making it last longer. Some of us allow up to three chain changes before changing the sprockets - but you need to keep a close eye on chain stretch, and change the chain as soon as it's failing the gauge. The most disciplined of us use three chains in rotation, switching every few weeks - that maximises the life of the chains and the sprockets, but needs dedication!

Replacing chains, sprockets, chain rings and cables needs some specialist tools and expertise, but it's not particularly difficult. There are loads of 'how-to' guides on the internet. If you're lucky, you'll find a video of someone working with the same model of gears as you have.

If you don't want to DIY, find a bike shop you can trust. Ask around to see which one others can recommend.

Consider toe clips and cleats

If you cycle with flat pedals and shoes, you can press down on the pedals for less than half of each rotation. When a pedal is at six-o-clock, your foot is just a passenger until your other foot rotates the pedal back up to twelve-o-clock.

ToeClipsToe clips attach to the front of your pedal and surround the front part of your foot. They give you some scope to pull a pedal up as well as push it down. They also allow you to put more oomph into the pedal as it moves forwards. When you stop, you have to take your foot out of the toe clip by pulling back.

Toe clips come with straps that allow you to tighten the clip around your foot while you cycle, and quick releases to allow you to extricate your foot when you stop. That's more efficient, but it's practical only for race tracks.

Clipless pedals - or 'cleats' - require both special pedals and shoes. A cleat on the bottom of the shoe engages with the pedal so the two are stuck together. As well as pushing down on the pedal, cleats allow you to pull up, push forward and pull back. You get to use more of your leg muscles and share the work between them. Cleats also ensure your foot is always in the optimum position on the pedal.

You get out of a cleat by twisting your heel sideways, away from the bike. That's not a natural movement and - until you're used to them - stopping can be a problem. It's normal for people to go over sideways - rather comically - a few times at first. Fortunately you are moving very slowly when it happens. It quickly becomes second nature and many argue that clipless pedals are easier and safer than toe clips.

There are two main types of clipless pedal:

An SPD cleat

    1. SPD or 'two hole' cleats were originally designed for downhill racers they:
      • Are easy to get in and out of
      • Do not protrude beyond the bottom of the shoe so you can walk normally when you get off the bike
      • Allow more freedom of movement (known as 'float') so you can get your foot at the right angle on the pedal
    2. A typical race cleatRacing or 'three hole' cleats come in colour variants with progressively less float: grey/yellow, red and black. They are more efficient at converting muscle power to forward motion.

Most of our riders that use cleats use the SPD style as they're more practical for our type of riding.

Note that it's important to fit cleats correctly. Knee joints work in just one plane. They cannot twist like your wrists. If you fit cleats at the wrong angle you can damage your knees. A high degree of float is important when you're starting out with cleats. Use an SPD cleat or a grey/yellow race cleat.

You can use an allen key to reduce the pressure needed to unclip a cleat. When starting out, set this to its lowest tension to make it as easy as possible to get out when you need to.

Pimp your bike

In the past, bike manufacturers seem to have designed their bikes for people riding fast on the flat. The lowest gears just aren't low enough for normal people doing our more difficult hills. That seems to be changing. As a result, more bikes are being sold with sensible gears and with options to replace components to give you lower gears.

If you want to lower your gears, the simplest way is to replace your cassette at the back with one that has more teeth in its largest sprocket. Your bike and derailleur will have a maximum sprocket size and range of sprockets (smallest to largest). You might, for example, be allowed to go from 25 teeth to 28. It doesn't sound a lot, but it will definitely make a difference. The manufacturer of your gear changers will have a web page that tells you the limits. A bike shop will also be able to advise you.

You can get an even larger sprocket at the back by either:

  • Replacing your derailleur with one that can accommodate a larger cassette (the derailleur has a bigger 'cage') - you'll also need a longer chain
  • Replacing your entire chain set with one designed for lower gears (typically a mountain bike chain set)

You can also get lower gear ratios by:

  • Replacing one or more of your front chain rings with a smaller version
  • Replacing a two-ring arrangement with a three-ring (or 'triple') one
  • Getting longer cranks for your pedals

But, unless you are prepared to experiment, you should get professional advice before taking any of those steps.

If your bike has hub gears, your options are limited because you can't change the gears inside the hub.

We hope the above is some help. Please ask around the next time you are on a ride if you have questions or get in touch via the web site. But remember, three cyclists can mean four opinions!

Father's Day family outing and charity ride on Hayling

We're keen to encourage young cyclists. Well Havant Rotary are organising a Father's Day family outing and charity ride, on Sunday, June 19th, 2016. It starts from Northney Farm Field (opposite the Tea Rooms), then south down the Billy Trail to the beach, and back again for a barbecue and bouncy castle. If you know any children or grandchildren, it's a great way to get them riding - or adults, come to that. And prostate cancer is a very appropriate charity for Father's Day.

Riders set off after registering and collecting their free T-Shirt at Northney Farm Field from 10 am. At the end of the ride there is a BBQ and activities back at the field. Alternatively, you can picnic if you wish to bring your own food.

Find out the answers to our quiz! No racing is involved so you have time to enjoy the ride and at the same time be sponsored to raise funds for Prostate Cancer UK and Havant Rotary‘s local Charities, or you can choose to donate your sponsorship money to your own charity.

This is a fun day for families who want to have an enjoyable day out with their children and bikes. The 12 mile ride should take about 2 hours at a family-friendly pace (but you can turn round at any point along the way if it's too difficult!). Why not get your wider family and friends to join in and make a real day of it?

Entry is only £12.50 for one adult and a child (under 18) and includes a free T-shirt. Additional children are £2.50 each to cover the cost of the T-shirt. When you complete the entry form don’t forget to let us know the sizes of T-shirt you need!

Fuller details are on the Rotary website at events.havantrotary.org.uk or on their Facebook page at https://www.facebook.com/events/502724423247667/

Slindon 2016

We had a great time even though we had problems with heating and hot water! The weather helped a lot - as did the food. As usual, Wally prepared a four course roast dinner to kick us off on Friday evening - and it kept coming: cooked breakfasts; curry on Saturday evening (with all the trimmings) and a finish-up-what's-left lunch on Sunday.

We are already taking bookings for next year - click here for more details.

Here are some photos. Click any image to see a larger version...

Where we were working...

Courthill farmhouse is a vacant property on the Slindon Estate. It has a lot of potential to generate income for the estate and the National Trust is considering how best to use it. In the mean time, the gardens need a lot of work to prevent them from becoming a wilderness.

Before and after...

Tom - our supervisor for the week-end - assigned us a set of tasks that we divided up between us. Here's some before and after images:

And some more after...

Unless someone has some before photos, you'll have to imagine how the site looked before we got going.

Clean up...

In case you were wondering what happened to the debris, we kept what logs the NT could sell off and burned the rest - all of it!

And then...

... to bed:

Emsworth cycle projects

The following has recently been sent by the Transport & Implementation Team based at Havant Borough Council as their November’s update regarding the various cycle infrastructure projects in Emsworth. Click either entry to find out more about:

Live projects

Havant Road A259: we have now resurfaced the former red cycle lanes, this was completed yesterday (18 Nov). We have already received positive feedback about the ride quality of the new lanes, although we have had to follow the old kerb lines which in places have sunk from their original level! Although some of the line painting was able to be done earlier today (for safety reasons we started with repainting the ‘give way’ markings across the side road junctions), we need dry weather to complete this; currently the intention is for the line painting to re-start on Saturday (weather permitting) which will involve painting the cycle lanes themselves. These will now be generally 1.5m wide, up from the original 1.1 – 1.2m; this will serve to visually narrow the road and assist in helping users to observe the 30mph speed limit. The red anti-skid (which will now only be placed in short lengths across junctions and crossings) might have to follow early next year as this requires consistently drier weather. We are now concluding work in the Barn Close area, building the new larger central island which we had to leave until now to assist with the traffic management during the resurfacing operation which took up to half the road width. We expect to broadly finish this by the end of next week. We will then fall back along the whole length of the job, clearing and tidying as we go. Additional road signs will be installed in the new year, linking through to the new route recently opened at Warblington School and so on into Havant.

Emsworth Station: the double deck 24-space cycle parking shelter installation onto the concrete slab we cast in October is expected to be completed by the end of the month. We then need to erect fencing around the shelter and it is expected to be open to the public in early December. When complete there will be a total of 48 stand spaces available at the station, compared with 18 previously. The environmental mitigation works (including a new information / interpretation board) agreed with the Emsworth Waysides Group for the northern site will be installed once the new shelter has been completed. The path to access the station subway on the north side will be widened to 2.5m and converted to ‘shared’ status once the shelter is in place.

Selangor Avenue / Victoria Road / Emsworth Primary School: apart from route confirmation signs along these roads, this scheme is complete.

Projects in design

The following projects are in various stages of design, with implementation planned during 2016.

Emsworth – Rowlands Castle cycle link: this is a new scheme to create a waymarked off road cycle friendly route between Hollybank Lane and Rowlands Castle through Hollybank Woods and Southleigh Forest. The route, which is intended to link National Cycle Network (NCN) route 2 in Emsworth with NCN22 at Rowlands Castle, involves targeted upgrades of existing paths and bridleways, signposting and route marking.

Horndean Road toucan crossing and Recreation Ground links: this is an upgrade to the existing crossing point at St James School. Design continues on this new facility; HCC has now provided the draft toucan layout so we are now able to work up the scheme in detail to link it to the wider network. This will include the signposting of a ‘quiet route’ link between Bellevue Lane and New Brighton Road via Christopher Way and Fairfield Close, providing a connection from the east to the new crossing point, as well as work within the Recreation Ground to widen the east and south side paths to create up to 3m wide shared routes. The scheme is planned to be built in the school summer holiday period in 2016.

Interbridges Link: we have reached agreement in principle with the relevant parties to implement proposals for a new east-west link between Washington Road and New Brighton Road, using land between the railway and the A27. This link will connect both into the new Station cycle parking area and the Interbridges junction, and by converting the verge on the east side of New Brighton Road (north of the Horndean Road junction) to shared status we will have achieved a quiet / off road route between Westbourne and Emsworth. Following a review of contractual arrangements and efficiency of delivery, it has been decided that this work is best done at the same time, and within the same contract, as the other work in the Recreation Ground and with the toucan crossing (i.e. summer holiday period 2016).

Havant’s Engineering Works Team are carrying out further work in North Street (currently outside Tesco), widening and improving the crossing points at the two junctions with Palmers Road. The remainder of the proposed works have been paused in case anything that comes out of the North Street Urban Design Consultation being run by Emsworth Forum conflicts with what we had planned to do.

Other Emsworth projects, including comprehensive and consistent waymarking of all the new routes through the network, will progress throughout the next year.

Please be aware that any future work may be adjusted in terms of scope and time scales.

The story of the Hayling Billy Trail 1984-2014

One evening in 1984 a group of local cyclists met in a house on Hayling Island to discuss what could be done to make cycling safer in the Havant area. We felt we needed one particular objective to focus on and, possibly because several of the people at the meeting were Hayling residents, we decided that objective would be to provide a safer north-south route on the island by using the disused railway line.

The bends on the Havant Road in 1984
1984 The bends on Havant Road
(click on any photo for a larger image)

We called ourselves the Havant and District Safe Cycling Campaign (a bit of a mouthful and it came to be referred to as the Havant Cycling Campaign) and formed a small committee. We lobbied Havant and Hampshire councillors and council officers; we gave articles to the Portsmouth News; and we held a public meeting at the Ship which was attended by a number of Havant councillors. Most important, we contacted John Grimshaw of the Railway Path Project in Bristol. John Grimshaw, a civil engineer, founded Sustrans and was their Chief Executive Officer until 2008.

Muddy trail in 1984
1984 North near West Lane

We organised a second public meeting (I think it was November 1984) at the Ship and on the morning of the meeting John came by train from Bristol with his Moulton. After a brief discussion he rode down the length of the railway line. Over tea we discussed John’s ideas in more detail and he put together a presentation using some slides which had been taken a few weeks before. He gave this presentation at the evening’s meeting. An impressive presentation, especially as it was all prepared in half a day.

Looking north near West Lane in 2014
2014 North near West Lane

More lobbying; more feeds to the News; presentations to various groups, including the Bosmere Hundred Society; around May 1985 a display in Havant precinct which included a boneshaker and a penny farthing to attract people’s attention We organised a circular ride from West Town to Havant (to near the museum) and back, one way along the track that was the old railway line, and the return along the main road. One of Hayling’s lady councillors got involved, surveying and comparing the routes from the back seat of a tandem that was piloted by one of our members. She became a useful supporter.

In April 1985 John Grimshaw produced a detailed proposal for the cycle path which we distributed to the relevant influential people. [click here to read the proposal]

The railway path proposal

A minor distraction occurred when another local group also became interested in the disused railway line with a view to restoring the railway and rebuilding the bridge. There was a lot of letter-writing to the local press from both sides, with arguments against the cycle route including how little cyclists spend compared with other tourists – “They ride to the beach and take sandwiches in their saddle bags”. The railway enthusiasts arranged a public meeting at the Hayling Billy pub, but a lot of support dropped away when it was pointed out that the island’s gas main had been laid under what had previously been the railway line. The councils didn’t take their suggestions too seriously and continued their support of the cycle path proposal.

Two of us were invited to meet the HBC chief executive who congratulated us on the quality of the proposal.

My notes at the time include:

  • 19th July 1985 Call from ……. in County Planning – “We want to get started”
  • 14th November 1985 Havant Planning and Development committee – “Report and recommendations agreed”
View towards Hayling station in 1984
1984 Towards Hayling station

Of course there were a lot of planning and legal matters to sort out, but eventually work started on the Hayling Billy trail. Not that it was perfect, far from it. I believe the Portsmouth harbour authorities refused to allow a tarmac path on the grounds of detraction from the natural environment, so the limestone dust surface was not the best for good quality machines and suffered in bad weather; a fence (wooden posts with two strands of wire) divided the cycle path from the path for horses, this was often cut (fishermen wanted to get to the bank or perhaps horse riders wanted to use the cycle path) or the posts were uprooted. One of our number was given a post-driver and some wire by the council so that he could do some repairs. He used to leave for work early with a few lengths of wire in his saddlebag to do running repairs.

2014 Towards Hayling station

The trail has been extended, improvements have been made and the path is now well used.

But what of the Havant Cycling Campaign? We were all cyclists so we started to publish a list of monthly Saturday rides and evening rides. These became very popular – mainly due to the statement on our rides list: 50 miles, leisurely pace, nobody left behind – and more frequent and those not working started to ride on Wednesdays as well. We started to have monthly meetings at the United Reformed church in Havant with slide shows, presentations and speakers on a wide variety of topics (not just cycling) which attracted non-cyclists and helped our name to get about. The group branched into foreign travel and somebody stuck an inspired pin into a list of Normandy hotels and hit upon perhaps the only hotel in Normandy where the owner used to race with Jacques Anquetil. For several years 30 or so of us spent the May bank holiday weekend in Montebourg.

1992 CTC magazineAs most of us were CTC members it was natural that we felt our activities – riding, social and campaigning – should be part of the local CTC, so our rides were merged into the Portsmouth CTC programme and the Wednesday and Saturday rides starting from Havant offered a popular addition to the traditional Sunday rides from Cosham

And what of the Hayling Billy Trail? Well used, well known, well signposted but, as at December 2014, with a far from ideal surface. When I took photos to compare them with the 1984 photos I had to find stretches which were not covered in large puddles and I had to wash my bike when I got home.

(Thanks to Dave Searle for his help in recalling things that I had forgotten.)

Bridges and ice

At this week's committee meeting, Roger described the problem he had with ice on the bridge between Eastern Road and Third Avenue. There was no ice on the roads at the time.

Turns out that is a well-established phenomenon and it's quite common to see signs saying "Bridge freezes before road" in the US.

The reasons are explained on several sites - Google "bridges ice before roads" to see a few. This site is particularly graphic.

Black ice is specially dangerous over bridges, so be careful out there!